ConnectIPS has grown to be one of the most widely used e-payment solutions in Nepal among bank customers for quick and simple financial transfers and bill/service payments using a mobile app or online banking. Here is a complete instruction for setting up a connectIPS account and connecting it to your bank account.
You can link one or more bank accounts with connectIPS and then use one of those accounts to make payments. This can be used for biller/service payments, fund transfers, travel and tour bookings, school and college fees, air travel, insurance, utilities, and other e-commerce website related payments.
A payment system called Connect IPS was launched by Nepal Clearing House Ltd. We can transfer funds across bank accounts utilizing this system. Additionally, you can use Connect IPS to pay any utilities and bills.
How to create an account in Connect IPS?
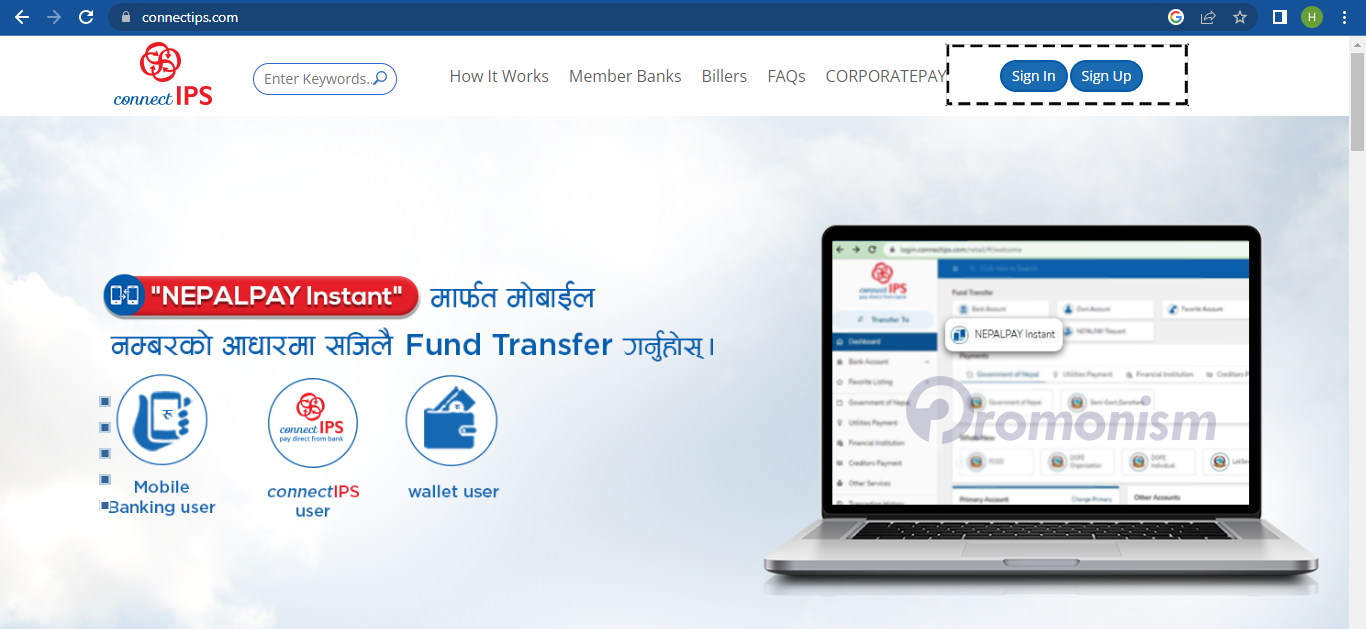
- Visit https://www.connectips.com first.
- Click the Sign In button if you already have an account. Click “Sign Up” if you want to Create a New Account.
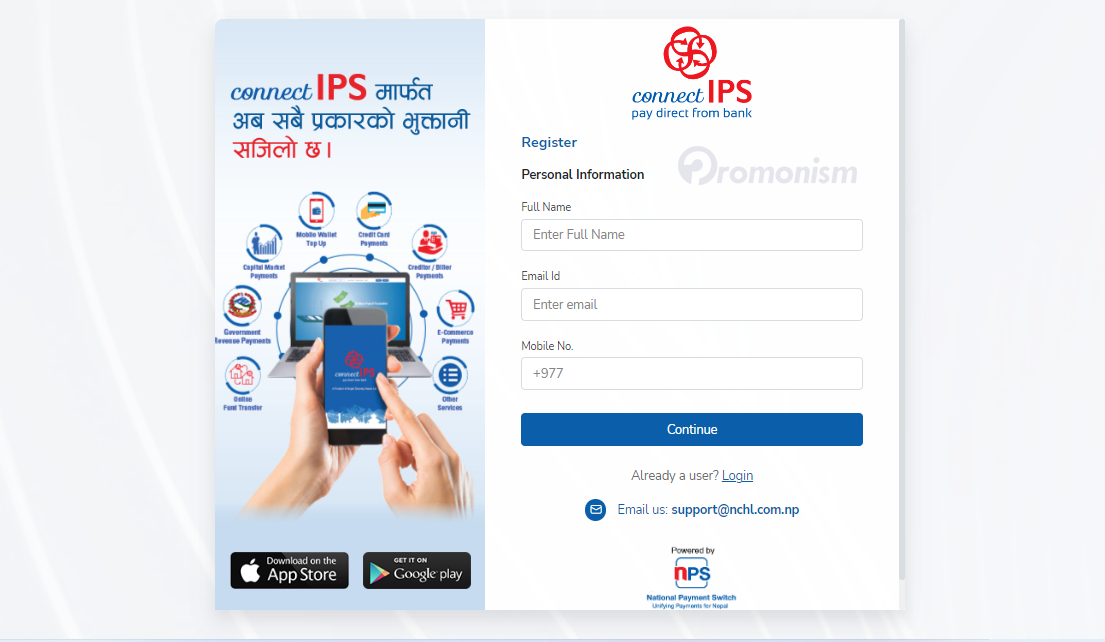
3. If you want to Create a New ConnectIPS account then Click “Sign Up,” provide all your contact details, (Full Name, Email id and Mobile Number) then “Click Continue”.
4. Now Set Your Username, Password and Confirm Password then “Click Continue”.
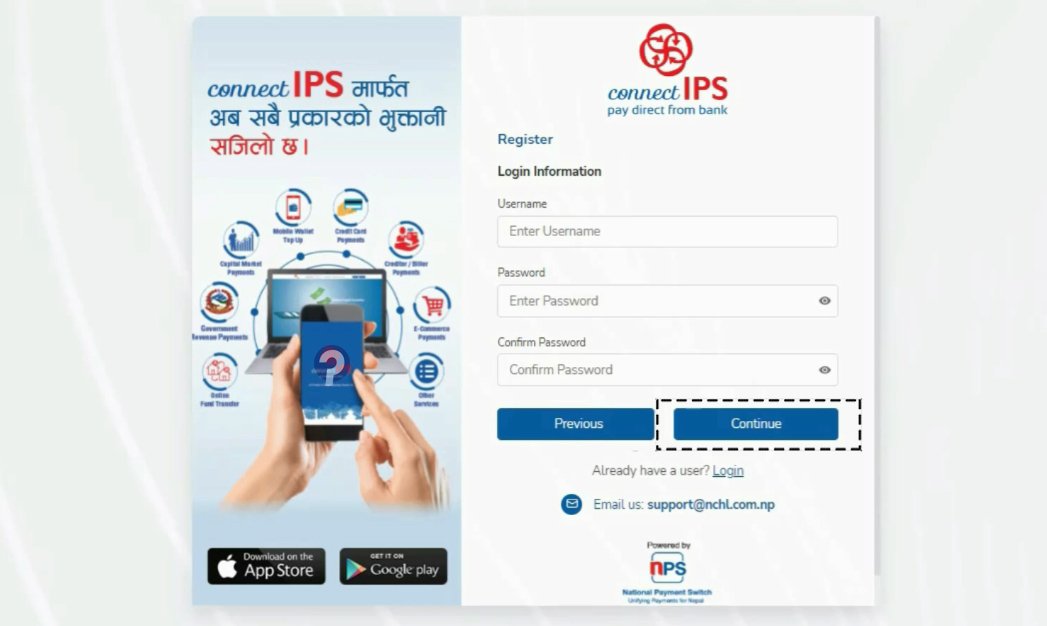
5. Please Note down your Username & Password and use them to Login Your Account.
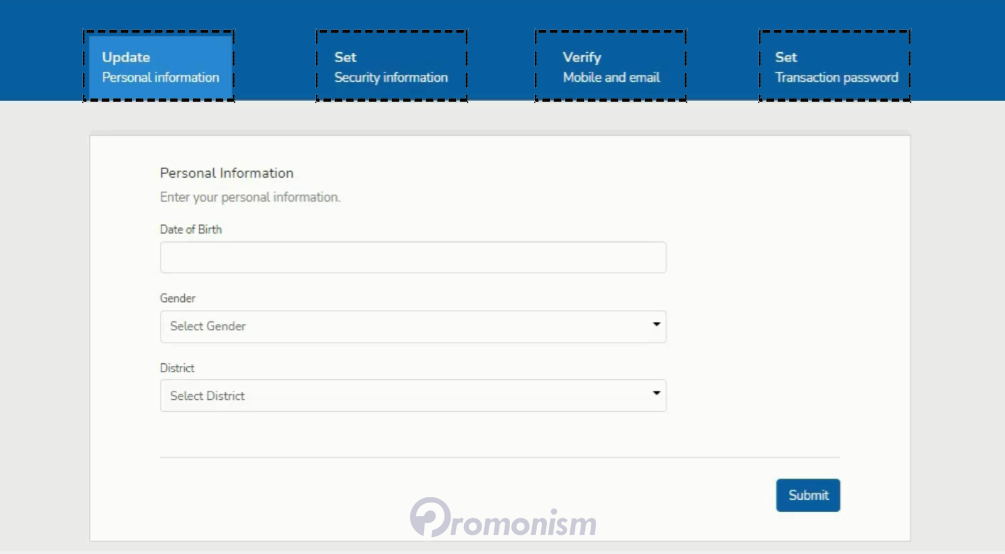
6. Now, Update your Personal Information, Set Security Information, Verify your Mobile Number and Email Address and also Set your Transaction Password then click “Submit”.
7. You will find a Section called “Bank Account”. Now Enter your complete Bank Details to Link your ConnectIPS Account to your Bank Account, and Click “Link Account”.
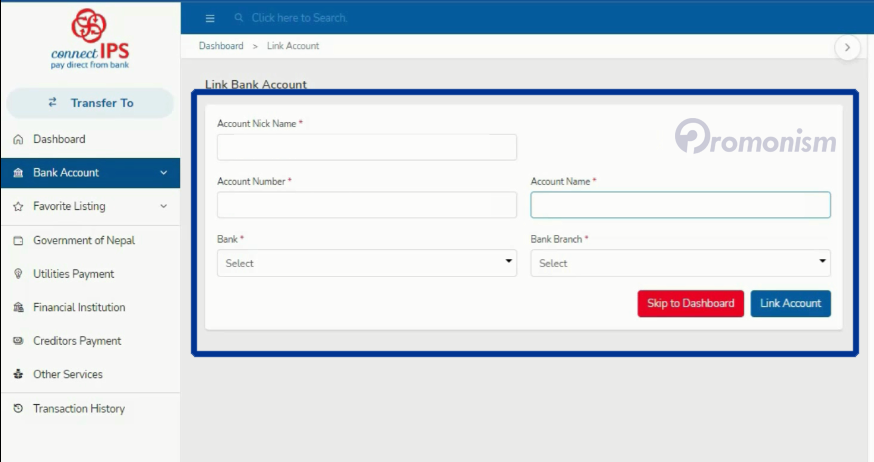
8. At Last, click in the bank that you just added. You will find a button called “Download Form”, Click it and submit that downloaded form to your Nearest Branch of your bank.


[…] Read: How to Create ConnectIPS Account | […]